The Insta360 Go is unlike any other stabilized action camera you’ve ever seen, and it’s one of the most interesting cameras I’ve tried because it’s clever, efficient, and easy-to-use.
This 18.3 gram steady camera is about the size of your thumb, but it shoots HD video, effortless hyperlapses, and it can go just about anywhere you want to take it.
For my recent trip with the Go, I wore the camera on my shirt, thanks to the device’s magnetic back and the pendant that comes with the standard kit. A quick press of the button on the back of the Go, and I had a video of my roller coaster ride.
Thanks to the device’s AI smarts, I also didn’t have to edit the clips from the trip–the Insta360 Go edits video for you, making it quick to shoot and share anything.
Design

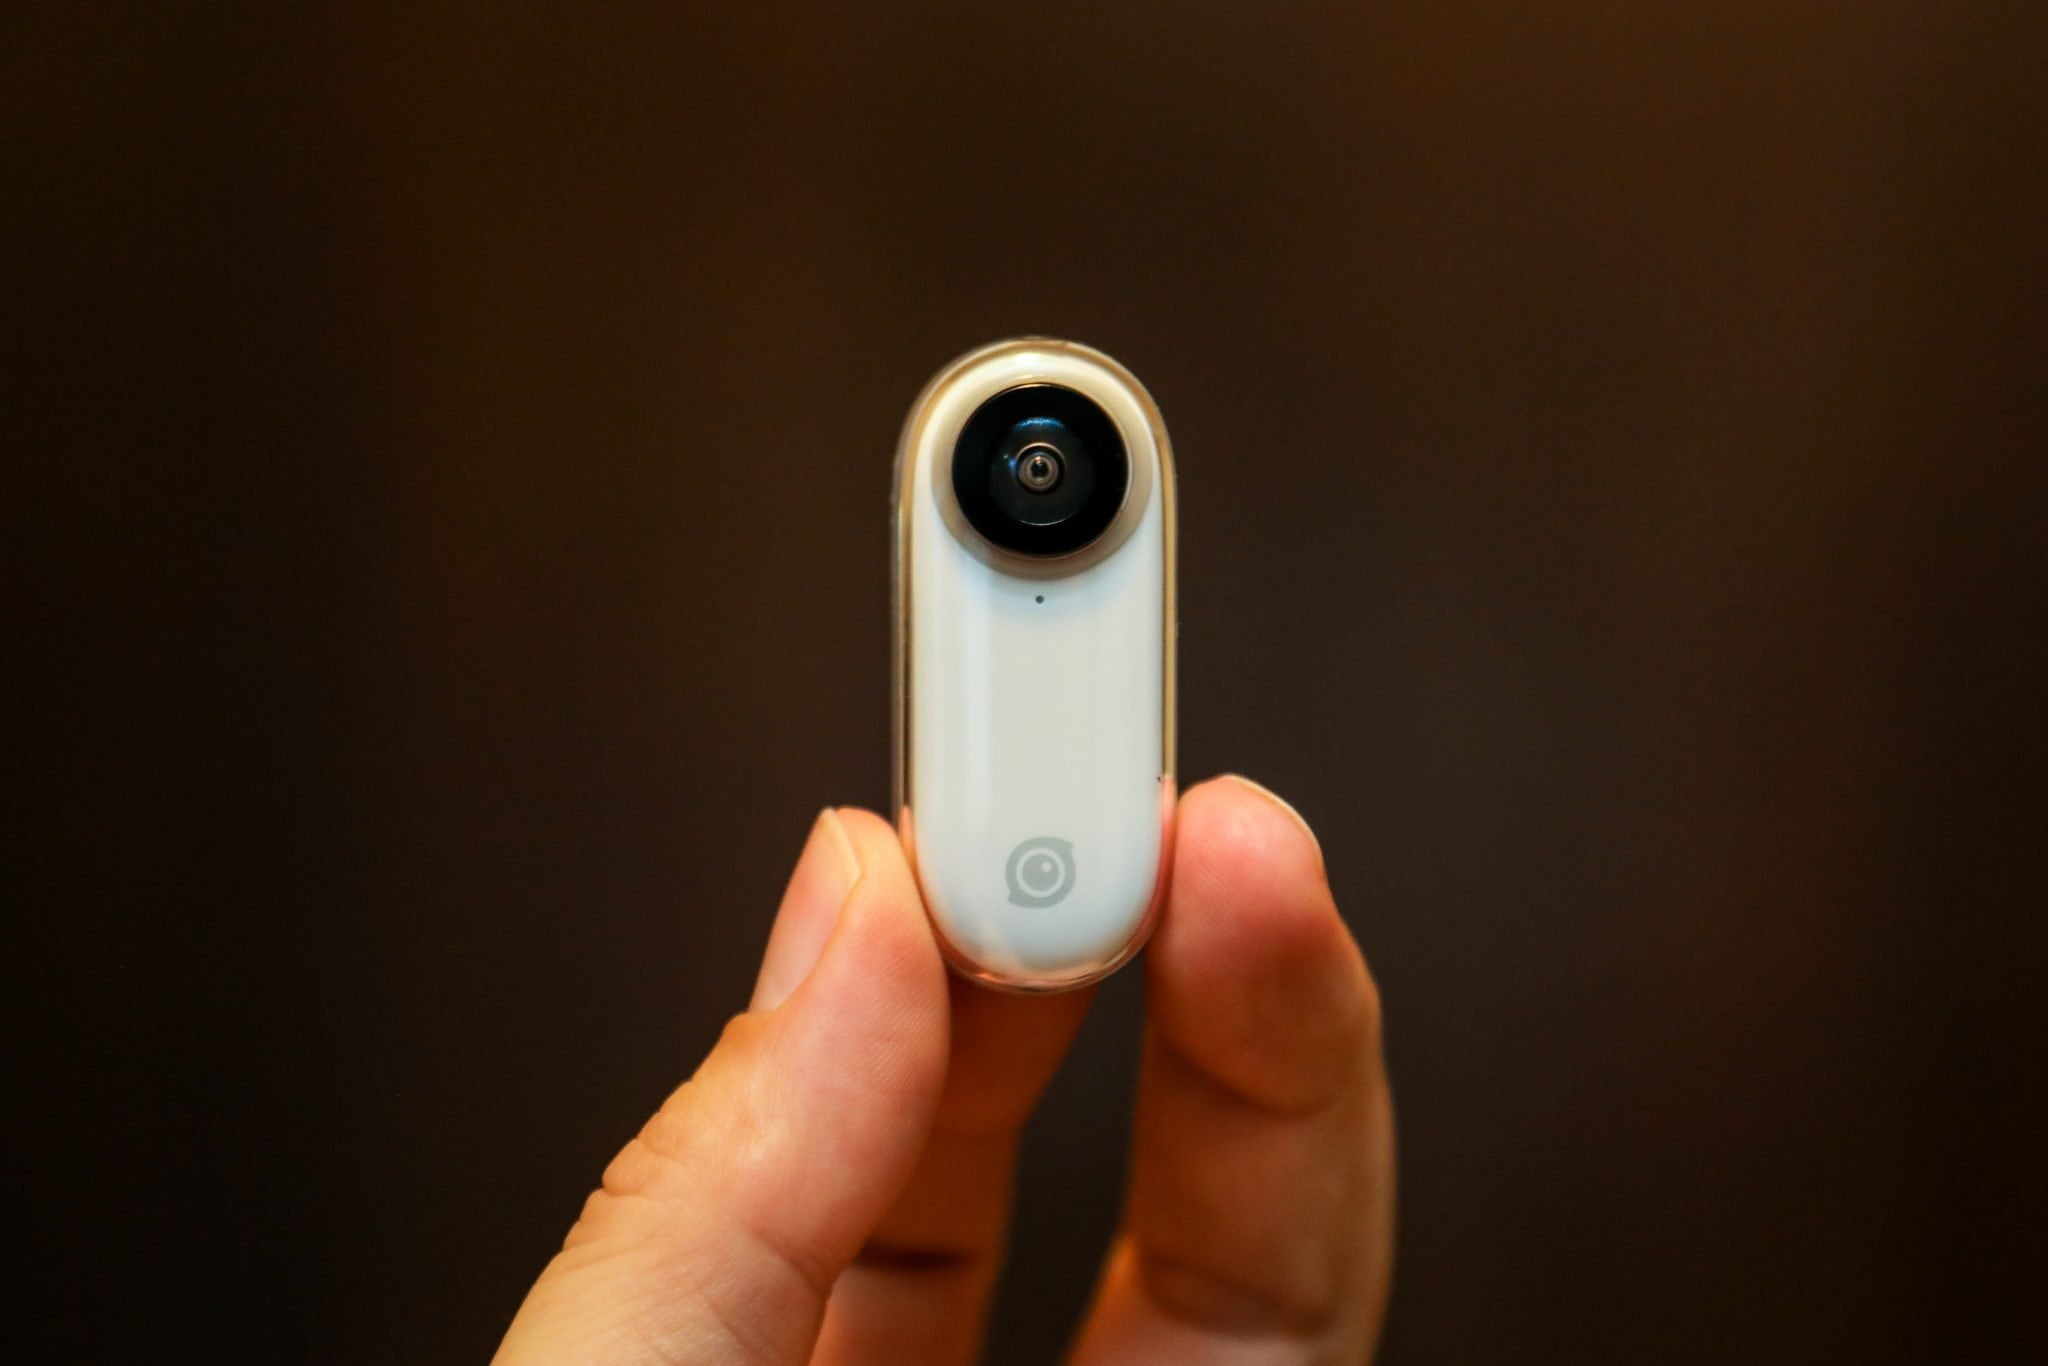
The overall design is super sleek, easy to hold, and shockingly small. The oval design make it sleek and comfortable, with the fish-eye lens barely sticking out from the body at the top, and the one button located on the back, at the bottom.
Because it’s so small, it can be easy to get your fingers into shots if you’re not careful, but that’s why the Go comes with a few accessories, including the easy clip, magnet pendant, pivot stand, sticky base, and angle wedge.
Those accessories also make it easy to mount the Go anywhere and take hyperlapses or timelapses, and just capture unique perspectives of just about anything.
With the pendant, that’s worn under your shirt, the Go camera attaches on top of your shirt thanks to the strength of the magnets between the pendant and the device. The camera hangs there, suspended on your chest like you might be dressed up as Tony Stark, and it’s easy to move, but strong enough that you can do a lot of activities and there’s little risk of the device falling off.
If I had one complaint from using the Go with the pendant, it’s that the instructions suggest you should be able to press on the front of the device while it’s on the pendant to effectively push the button that’s on the back, so you can record something from the stand-by mode without pulling the device off the pendant.
I was sometimes able to make this work, but often it didn’t seem like the button sticks out enough on the back to activate the Go while it’s on the pendant. I’d love to see this addressed in future versions of the device, but it just means you either have to press down harder, or detach the Go, activate it, and then place it back on the pendant.
Finally, the Go fits inside a special charging case to keep it running longer, and you download videos and images to your phone using the supplied cable for Android, or with the built-in iPhone Lightning connector.
Features & Functionality
The Insta360 Go takes up to 200 captures using the charging case, or 20 minutes in one session before it needs to go into the charging case. Using the charging case, the Go can last for about an hour of shooting, although that will depend on a number of factors.
Shooting modes include standard video, interval, slow motion for either 15 or 30 seconds, hyperlapse videos up to 30 minutes to create a 5-minute video, and timelapse of up to 1.5 hours, although I haven’t tried such a long timelapse to see if the battery can last that long.
To shoot, you can either just press the button on the back of the Go to jump into QuickCapture, or you can turn the camera on by holding down the button for a couple of seconds until it vibrates twice, turning the device fully on so you can capture more quickly or connect from your phone via Bluetooth and trigger the shooting modes externally.
QuickCapture is definitely the quickest and easiest way to capture something, and it also saves the battery so you can shoot for longer. You just have to remember what each button press does, although these options can also all be changed from within the app when you’re connected to the camera.
For reference, you press the button once to start a 30-second video, and press the button again to stop the recording before 30 seconds. Pressing the button twice in a row starts a hyperlapse, and triple tap it to capture a 100FPS slow-motion clip.
Once you’ve captured the moment, you can edit the clip in the Insta360 Go app, but thanks to FlashCut auto editing, the built in AI will help create striking videos for you. The app’s editing tools, however, let you trim, adjust colours, add music, and even create barrel roll effects or change the speed of timelapses.
And on top of everything else, you can output your videos or photos from the camera in a range of formats, including square (1:1), horizontal (16:9), and vertical (9:16), which makes it easy to share on any social media sites.
Finally, if you’re shooting near water, the camera has you covered since it’s IPX4 water-resistant. The camera will be fine if it just gets splashed, or submerged for up to 10 seconds. That’s the limit though, so it’s not made for underwater shooting or video in a downpour, but it’s good enough for most activities.
Image & Video Quality

The quality of the videos and images from the Go are very impressive, especially for the size of the device. Shooting outdoors or in bright conditions yields great, high-quality results in HD.
Mainly, the issues I had with the Go were in dark conditions or when there were overcast skies with some sun. In the dark, the video is fairly grainy and indistinct, but this camera is really not made to be used in the dark. I’d love to see it handle complex lighting situations a little better though, since that can be more common shooting conditions.
The quality of the video stabilization is truly exceptional otherwise, and one of the best features next to the simplicity of editing and exporting video.
Final Notes
The Insta360 Go retails for USD $199, or $279 Canadian, and I think that’s a great deal considering the robust features, all of the accessories, and the overall quality of the videos.
The camera is so lightweight, and so powerful, that it sets the bar very high for this type of micro steady camera, and it’s easy to literally take it anywhere. I put the charging case in my pocket while I was on vacation, and just put it on any time I was ready to shoot. Being able to plug it directly into an Android or iPhone to then share video in seconds is also amazing.
For creators who want a go-anywhere tool, and anyone just looking to capture things a little easier, the Insta360 Go is an impressive tool that inspires creativity.
Watch my videos shot with the Insta360 Go below, and scroll down for the official intro video.